Stencil Graffiti Wall Effect in Photoshop | Photoshop Effect | Photoshop Tutorial
- Deep Shah
- Nov 1, 2019
- 2 min read
Updated: Nov 6, 2022
In this tutorial , you will learn how to create this Stencil Graffiti Wall Effect in Photoshop. So just follow the steps and learn this easy method to create it for yourself . So let's get started!

Download Photoshop :- https://prf.hn/l/OVRDLJm
Equipment I use :-
Primary Laptop :- https://amzn.to/3BLqADZ
Secondary Laptop :- https://amzn.to/3wryYWo
Mouse :- https://amzn.to/3zsnuCH
Original Image Download link :- https://www.pexels.com/photo/man-standing-in-the-middle-of-road-1553783/
Brick Wall Image Download Link :- https://www.pexels.com/photo/brown-brick-wall-1227515/
Final Image PSD Download Link :- https://drive.google.com/open?id=1S9ckYzndLAXwraX6_qxEz0HP9NBR8v85
Youtube Video :-
Steps on how to create this Stencil graffiti wall effect in Photoshop :-
So the first step is to select model in the image using Quick Selection tool


Now to deselect a selection press ALT and then click and hover over the area where selection needs to removed OR Click on Subtract from selection icon and then click and hover over the area where selection needs to be removed


After the selection is done properly click on Refine edge to get the selection of Hair and edges properly

Then after that click and hover over the edges and hair to get proper selection

After the selection looks proper then click on Ok

Now right click on the selection and then select Layer via copy over there

Then press CTRL and click on layer icon of the new layer this will give you back selection of the model
Now press CTRL + C to copy the selection
Then open any wall image in a new tab

After that press CTRL + V over here to paste the selection i.e Model

Now press CTRL + T to scale the model image and make it fit to the wall and after pressing CTRL + T drag from any corner and press SHIFT while dragging to scale it evenly and after scaling place the model properly

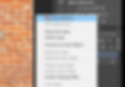
Now go to Image and then adjustments and then select Desaturate over there to convert model image to Black and White

Now again go to Image and then adjustments and then select Posterize over there

Then in the pop up set the levels between 2-3 and then click on Ok

Then change the blending mode of the layer to Hard light and after that reduce the opacity of the layer to 80%


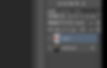
Now right click on the layer and select blending options over there
Then drag the left underlying slider to the right i.e Change form 0 to some number this will help blend the image with wall

So this will give you your Stencil graffiti wall effect in Photoshop!
So that's it guys! So now if you guys liked this tutorial then hit the like button also share it to the ones who might be interested in such tutorials!
Youtube Video :-