Instagram 3D Pop Out Effect in Photoshop | Photoshop Effect | Photoshop tutorial
- Deep Shah
- Nov 29, 2019
- 3 min read

Updated: Nov 6, 2022
In this tutorial , you will learn how to create this awesome Instagram 3D pop out effect in Photoshop. Creating such effect might look a bit difficult but it is not so just follow the steps mentioned below and learn how to create it for yourself . So let's get started!

Download Photoshop :- https://prf.hn/l/OVRDLJm
Equipment I use :-
Primary Laptop :- https://amzn.to/3BLqADZ
Secondary Laptop :- https://amzn.to/3wryYWo
Mouse :- https://amzn.to/3zsnuCH
Dog Photo Image Download Link :- https://www.pexels.com/photo/brown-and-black-puppy-in-hammock-blanket-3198032/
Model Image Download Link :- https://www.pexels.com/photo/selective-focus-photography-of-sitting-woman-holding-open-book-3251703/
Final PSD Download Link for Dog Image :- https://drive.google.com/open?id=1lCzQO6GhtCrzbEpUHNqMb8y8bk64Oh9Z
Final PSD Download Link for Model Image :- https://drive.google.com/open?id=1jpnpuFNDI4NW9KnmrsYcqZ8A-ioMUz7X
Youtube Video :-
Steps on how to create Instagram 3D pop out effect in Photoshop :-
So the first step is to take screenshot of any image in Instagram as shown below and open it in Photoshop

Then unlock the background layer by double clicking on the lock icon and then in the pop up click on OK


Now we have to remove the image from the screenshot so for that select Rectangular Marquee tool and then make the selection of image using marquee tool


Then press the DEL key of your keyboard which will remove the image and replace it with Transparent background as shown below

Now we have to bring the image for which we have to create 3D effect over here which will look like as shown below
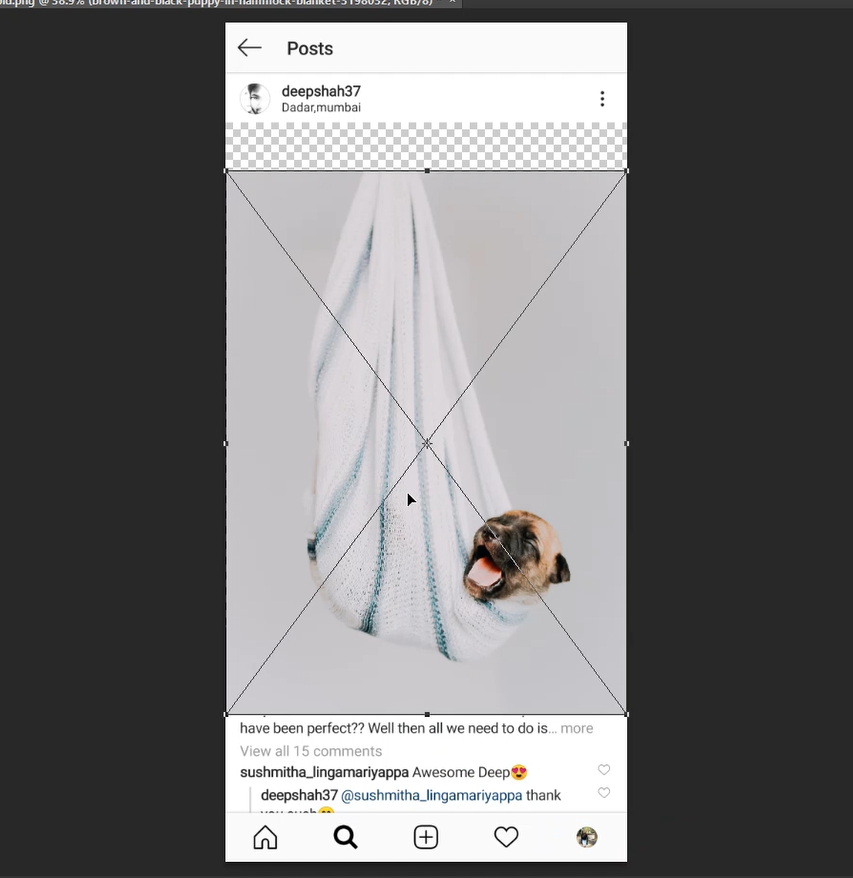
After that reduce the opacity of the layer so that we can scale and place the image properly

Now scale the image accordingly (Press SHIFT while scaling to scale evenly) and place it properly

After that click on Tick icon and then increase the opacity of the layer back to 100%


Now select the part of the image which is out the frame and you want to make it as a pop out using Quick selection tool (Note :- Press ALT and then click and hover over the parts to deselect a selection)


Once the selection looks proper then press CTRL + J to create a duplicate of the selection into new layer

Then make the Dog image layer active again by clicking on it
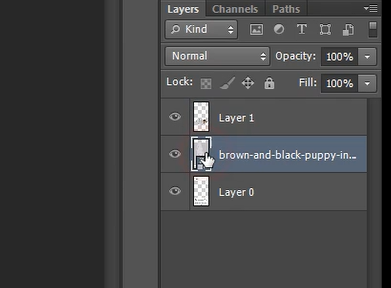
Then press CTRL and click on the icon of Instagram image layer which will give you selection of Instagram image layer


After that press CTRL + SHIFT + I to invert the current selection

Now click on Add layer mask icon to mask the current image to the selection


After that make the duplicate image layer active by clicking on it

Now click on Add layer style icon and select blending options over there

After that in the pop up select Drop shadow and then set the following , Angle : 90 Deg , Distance : 10px , Spread : 5% , Size : 30px and then click on OK

So it will add a shadow for the duplicate selection

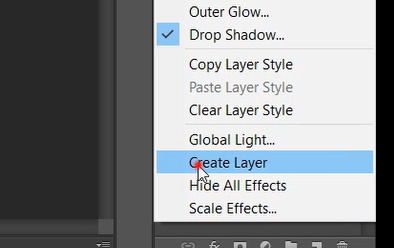
So as you can see that it adds a nice shadow to make it more realistic but it also adds shadow at the upper end which is not required so for that right click on the Drop shadow tab of the layer and then select Create layer over there and then in the pop up click on OK so it will create a new layer only of shadow in it

Now make the drop shadow layer active by clicking on it and then click on Add layer mask

Now set the foreground color as black and then select brush tool and brush as soft round


Now using the brush tool click and hover over the parts where shadow needs to be removed

So after the removal of upper shadow you will get the final desired image

So that's it guys! So now if you guys liked this tutorial then hit the like button also share it to the ones who might be interested in such tutorials!
Youtube Video :-


Comments